Use Custom DNS Servers With Mullvad And Any WireGuard Client
I’ve been using Mullvad VPN for a while now but only ever used it with the official client on my workstation. I use DNS extensively in my home network, so as soon as I activate Mullvad, I can’t resolve DNS names locally. Of course, this is by design and expected. I own an OPNsense appliance, so the natural solution is to move the tunnel there.
TL;DR
Use the following shell command to request an IP with no DNS hijacking:
# Authenticate to Mullvad and store the returned access token
access_token=$( \
  curl -X 'POST' 'https://api.mullvad.net/auth/v1/token' \
    -H 'accept: application/json' -H 'content-type: application/json' \
    -d '{ "account_number": "YOUR MULLVAD ACCOUNT NUMBER" }' \
  | jq -r .access_token)

# Create a new Mullvad Device with DNS hijacking disabled
curl -X POST https://api.mullvad.net/accounts/v1/devices \
  -H "Authorization: Bearer $access_token" -H 'content-type: application/json' \
  -d '{"pubkey":"YOUR WIREGUARD PUBLIC KEY","hijack_dns":false}'
Mullvad Hijacks DNS Queries Over WireGuard Tunnels
Instead of using the OpenVPN protocol, I decided to go with the latest and greatest: WireGuard. OPNsense is a fork of FreeBSD but lacks a kernel implementation of WireGuard, requiring a plugin. It’s good enough for me to try, and I hope WireGuard will be natively supported soon.
During my research on how to best configure this, there seemed to be the caveat of Mullvad hijacking DNS traffic going through WireGuard tunnels, redirecting it to their DNS servers. It decreases the likelihood of DNS leaks, but power users like you and I might not want that. What if I want to query DNS root servers through the VPN tunnel because I use my own DNS resolver? Mullvad hijacking DNS queries would make my DNS resolver trip up.
What a bummer, right? Looking at the Mullvad FAQ, it seemed the only solution was to resort to OpenVPN:
Ports 1400 UDP and 1401 TCP do not have DNS hijacking enabled, which might work better for pfSense users
But Mullvad launched support for custom DNS servers on the Mullvad VPN app back in April 2021. It also works for WireGuard, so what’s the secret?
Reverse-engineering the Mullvad App
Searching through the docs, I found the WireGuard on a router article explaining how to get an IP to use with Mullvad via API (note that this snippet is outdated):
curl https://api.mullvad.net/wg/ -d account=YOURMULLVADACCOUNTNUMBER --data-urlencode pubkey=YOURPUBLICKEY
Next, let’s look at how the app requests IPs.
Fortunately it’s open-source and available on GitHub,
so the only reverse-engineering we’re going to be doing is reading some code. It
turns out that
the app uses the https://api.mullvad.net/app/v1/devices endpoint to create a Mullvad Device with DNS hijacking disabled.
Testing Both APIs
For testing, we’ll be using the
official WireGuard client. Let’s open the
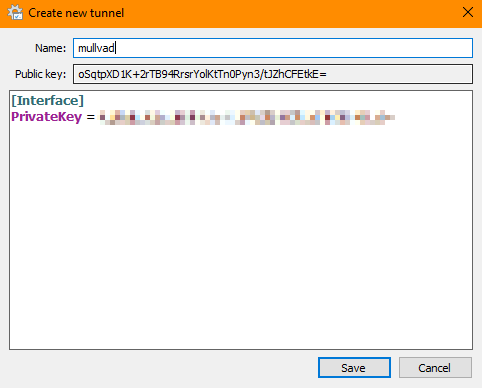
client, click Add empty tunnel..., and give it a name:

The tunnel will initially look like this:

Copy the public key and execute the following to request our Mullvad IPs (because the snippet is outdated, this might not work in the future):
curl https://api.mullvad.net/wg/ -d account=YOURMULLVADACCOUNTNUMBER --data-urlencode pubkey=YOURPUBLICKEY
The response will return an IPv4 and IPv6 address. Add the following to the configuration file:
[Interface]
PrivateKey = <PRIVATE KEY>
Address = <IPv4 ADRESS>
DNS = 9.9.9.9

[Peer]
PublicKey = bmy9vGzMqc0yS3IiMMyOONyXRwPCMiyhR/bnNQ2LsCE=
AllowedIPs = 0.0.0.0/0
Endpoint = 31.7.59.250:51820
We use the ch2-wireguard Mullvad server as peer and
Quad9 as DNS server.
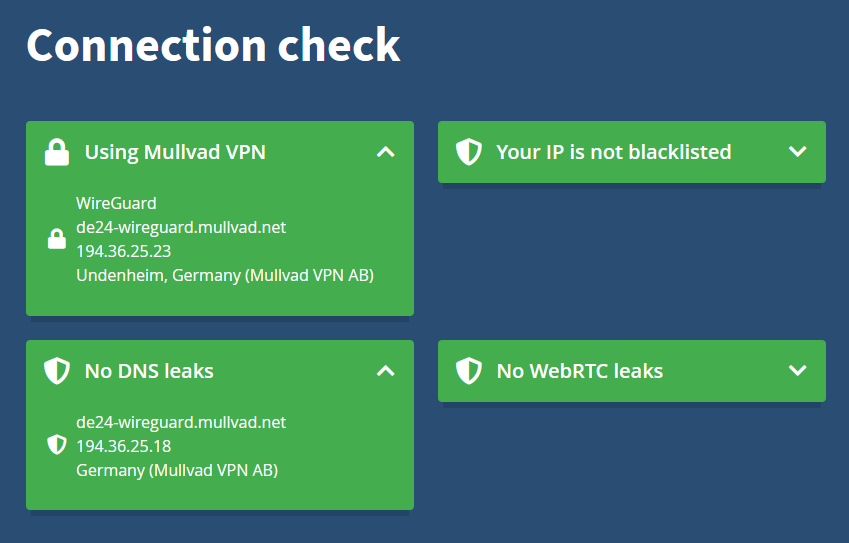
Let’s activate the tunnel and browse to Mullvad’s connection check:

As expected, the Quad9 DNS server is not leaking through because Mullvad hijacks our DNS requests and redirects them to their DNS servers.
Next, we use the API the app uses to request the Mullvad IPs. Before we can do this, we create a new public key with the WireGuard client because Mullvad doesn’t allow using the same public key more than once.
Then we authenticate to Mullvad and store the returned access token:
access_token=$( \
  curl -X 'POST' 'https://api.mullvad.net/auth/v1/token' \
    -H 'accept: application/json' -H 'content-type: application/json' \
    -d '{ "account_number": "YOUR MULLVAD ACCOUNT NUMBER" }' \
  | jq -r .access_token)
Next, we create a new Mullvad Device with DNS hijacking disabled:
curl -X POST https://api.mullvad.net/accounts/v1/devices \
  -H "Authorization: Bearer $access_token" -H 'content-type: application/json' \
  -d '{"pubkey":"YOUR NEW WIREGUARD PUBLIC KEY","hijack_dns":false}'
Next, we replace the IP in Address field of the WireGuard config with the new
IP we received. Then we activate the tunnel and visit
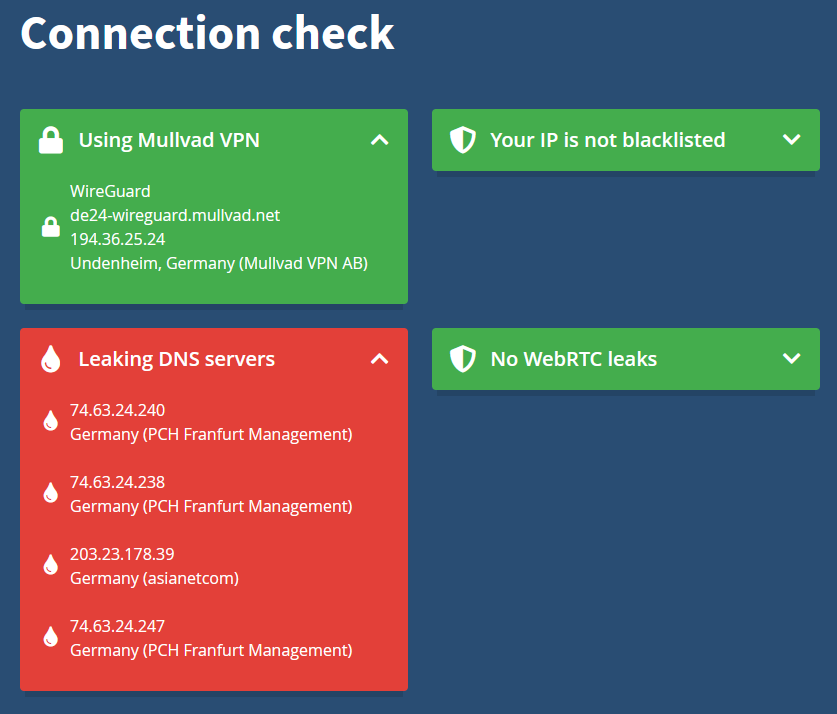
Mullvad’s connection check:

Hooray, the Quad9 DNS servers leak through, so Mullvad is not hijacking our DNS traffic for this tunnel!
