This beginner-friendly, step-by-step guide walks you through the initial
configuration of your OPNsense firewall. The title of this guide is an homage to
the
pfSense baseline guide with VPN, Guest, and VLAN support
that some of you guys might know, and this is an
OPNsense migration of it. I found that guide two years
ago and immediately fell in love with the network setup. After researching for
weeks, I decided to use OPNsense instead of pfSense. I bit the bullet and bought
the Deciso DEC630 appliance.
Albeit expensive and possibly overkill for my needs, I’m happy to support the
open-source mission of Deciso, the maintainers of OPNsense. The only thing I
regret about the purchase is that I now can’t afford the sexier-looking
successor model, the
DEC690.
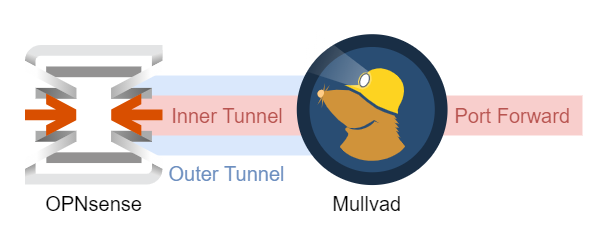
I’ve been using Mullvad VPN for a while now but only
ever used it with the official client on my workstation. I use DNS extensively
in my home network, so as soon as I activate Mullvad, I can’t resolve DNS names
locally. Of course, this is by design and expected. I own an
OPNsense appliance, so the natural solution is to move
the tunnel there.