This beginner-friendly, step-by-step guide walks you through the initial configuration of your OPNsense firewall. The title of this guide is an homage to the pfSense baseline guide with VPN, Guest, and VLAN support that some of you guys might know, and this is an OPNsense migration of it. I found that guide two years ago and immediately fell in love with the network setup. After researching for weeks, I decided to use OPNsense instead of pfSense.
My homelab grew quite a bit over the past years. And with that, my networking needs also changed: stricter firewall rules, segregating untrusted IoT devices into separate networks, traffic prioritization, and more. I wanted to document my switch and VLAN configuration. And maybe this is useful for someone else, too.
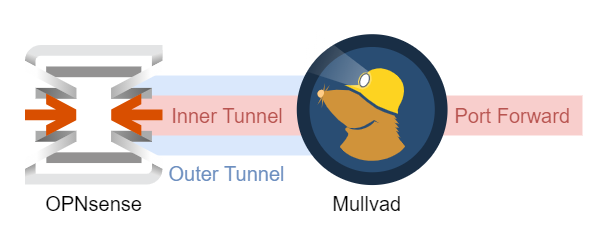
I’ve been using Mullvad VPN for a while now but only ever used it with the official client on my workstation. I use DNS extensively in my home network, so as soon as I activate Mullvad, I can’t resolve DNS names locally. Of course, this is by design and expected. I own an OPNsense appliance, so the natural solution is to move the tunnel there.
TL;DR# Use the following shell command to request an IP with no DNS hijacking:
In this post, we will deploy a simple
Azure Kubernetes Service (AKS)
cluster from scratch. To expose our web services securely, we will install
Traefik 2 and configure cert-manager to manage Let’s
Encrypt certificates. The best part about it: we will do everything with
Terraform.